Adding Assets
Create new asset records to begin tracking items in your inventory.
Walkthrough
Step 1 of 4Click "New" to start
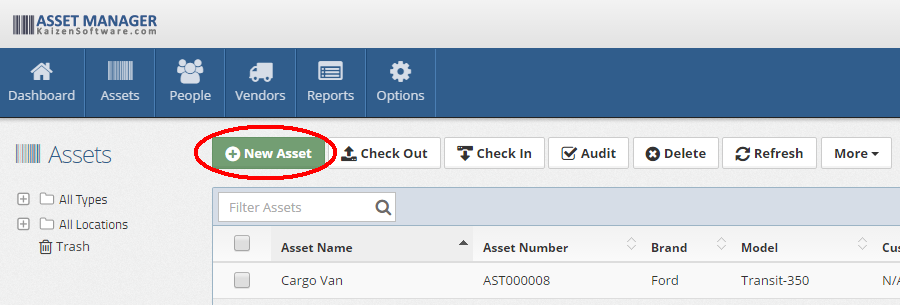
Navigate to Assets and click the New button in the toolbar. You can do this from the asset list or from any existing asset detail page.
General Tab Fields
| Field | Description |
|---|---|
| Asset Name | A descriptive name for the asset (required) |
| Asset Number | A unique identifier. Leave blank to auto-generate |
| Asset Type | The category this asset belongs to (e.g., IT Equipment, Furniture) |
| Manufacturer | The manufacturer of the asset |
| Brand | The brand name |
| Model | The model name or number |
| Individual / Bulk | Whether this is a single tracked item or a quantity of identical items |
| Photo | Upload a picture of the asset |
Individual vs. Bulk assets
- Individual assets are tracked as single items with their own serial number, custodian, and status.
- Bulk assets represent a quantity of identical items (e.g., 50 safety vests). Each quantity batch has its own status and purchasing details.
Choose Bulk and click Add More to add quantity batches after saving.
Additional Tabs
After saving the initial record, you can fill in additional details across the remaining tabs:
- Details — Status, custodian, location, serial number, condition, and audit settings. See Editing Assets for field details.
- Purchasing — Vendor, purchase price, date purchased, PO number, account code, and warranty expiration.
- Service — Service schedules and service log entries (individual assets only). See Service and Maintenance.
- Notes — Free-form rich text notes about the asset.
- Files — Attach documents, manuals, warranties, or other files.
- History — A read-only log of all changes made to this record.
Tips
- Use consistent naming conventions so assets are easy to search and report on.
- Set up your asset types and locations before adding assets in bulk.
- For large inventories, consider using the import tool instead of creating records one at a time.